Local development
Inngest's tooling makes it easy to test your functions locally with any framework using the Inngest dev server.
Inngest Dev Server
The Inngest dev server is an open source environment that:
- Runs a fast, in-memory version of Inngest on your machine
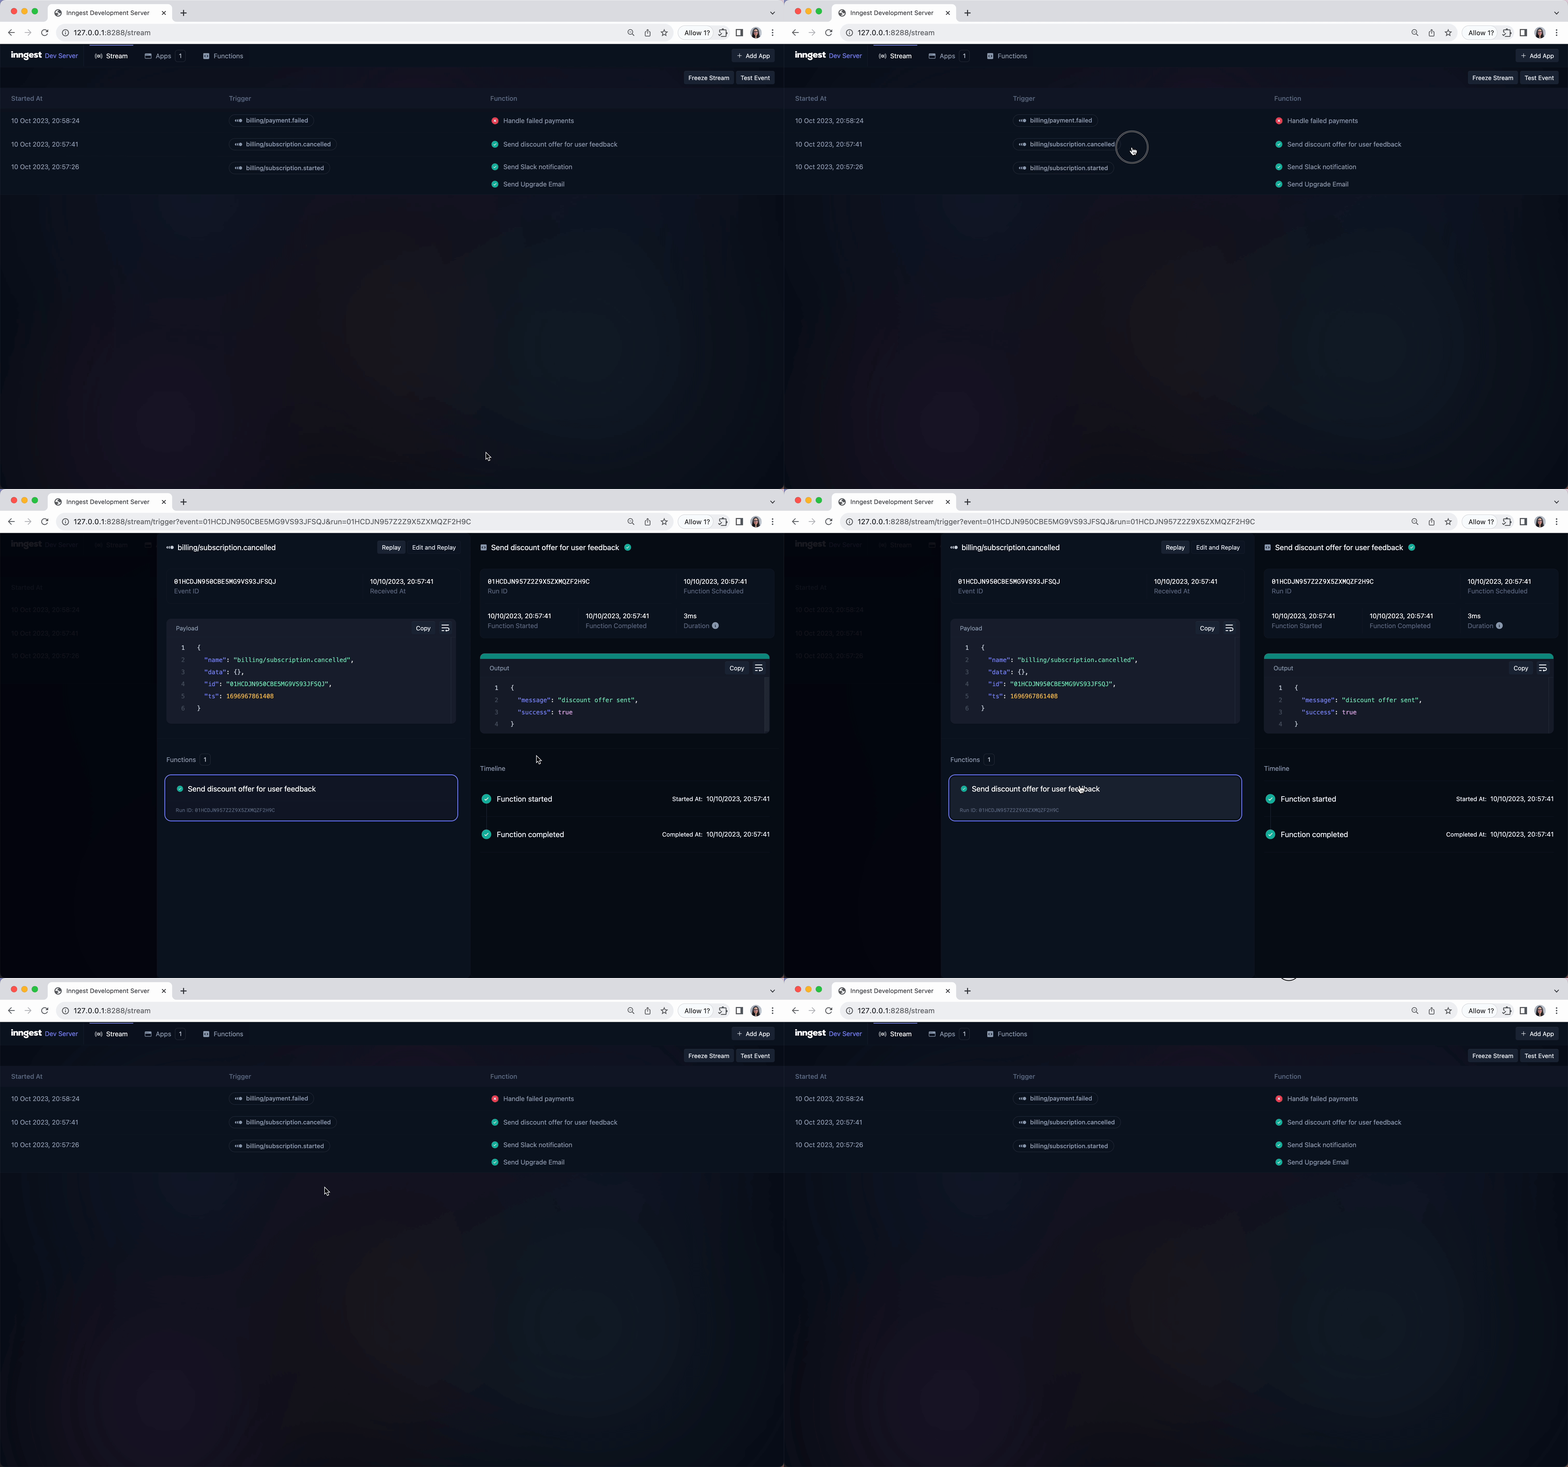
- Provides a browser interface for sending events and viewing events and function runs

To start the dev server is a single command. It will scan for ports and common endpoints for an Inngest serve API endpoint (list of ports):
npx inngest-cli@latest dev
# You can also tell the local URL for the dev server to check
npx inngest-cli@latest dev -u http://localhost:3000/api/inngest
You can now open the dev server's browser interface on http://localhost:8288. For more information about developing with Docker, see the Docker guide.
Connecting apps to the Dev Server
There are two ways to connect apps to the Dev Server:
- Automatically. The Dev Server will keep detecting and attempting to connect to apps running in common ports.
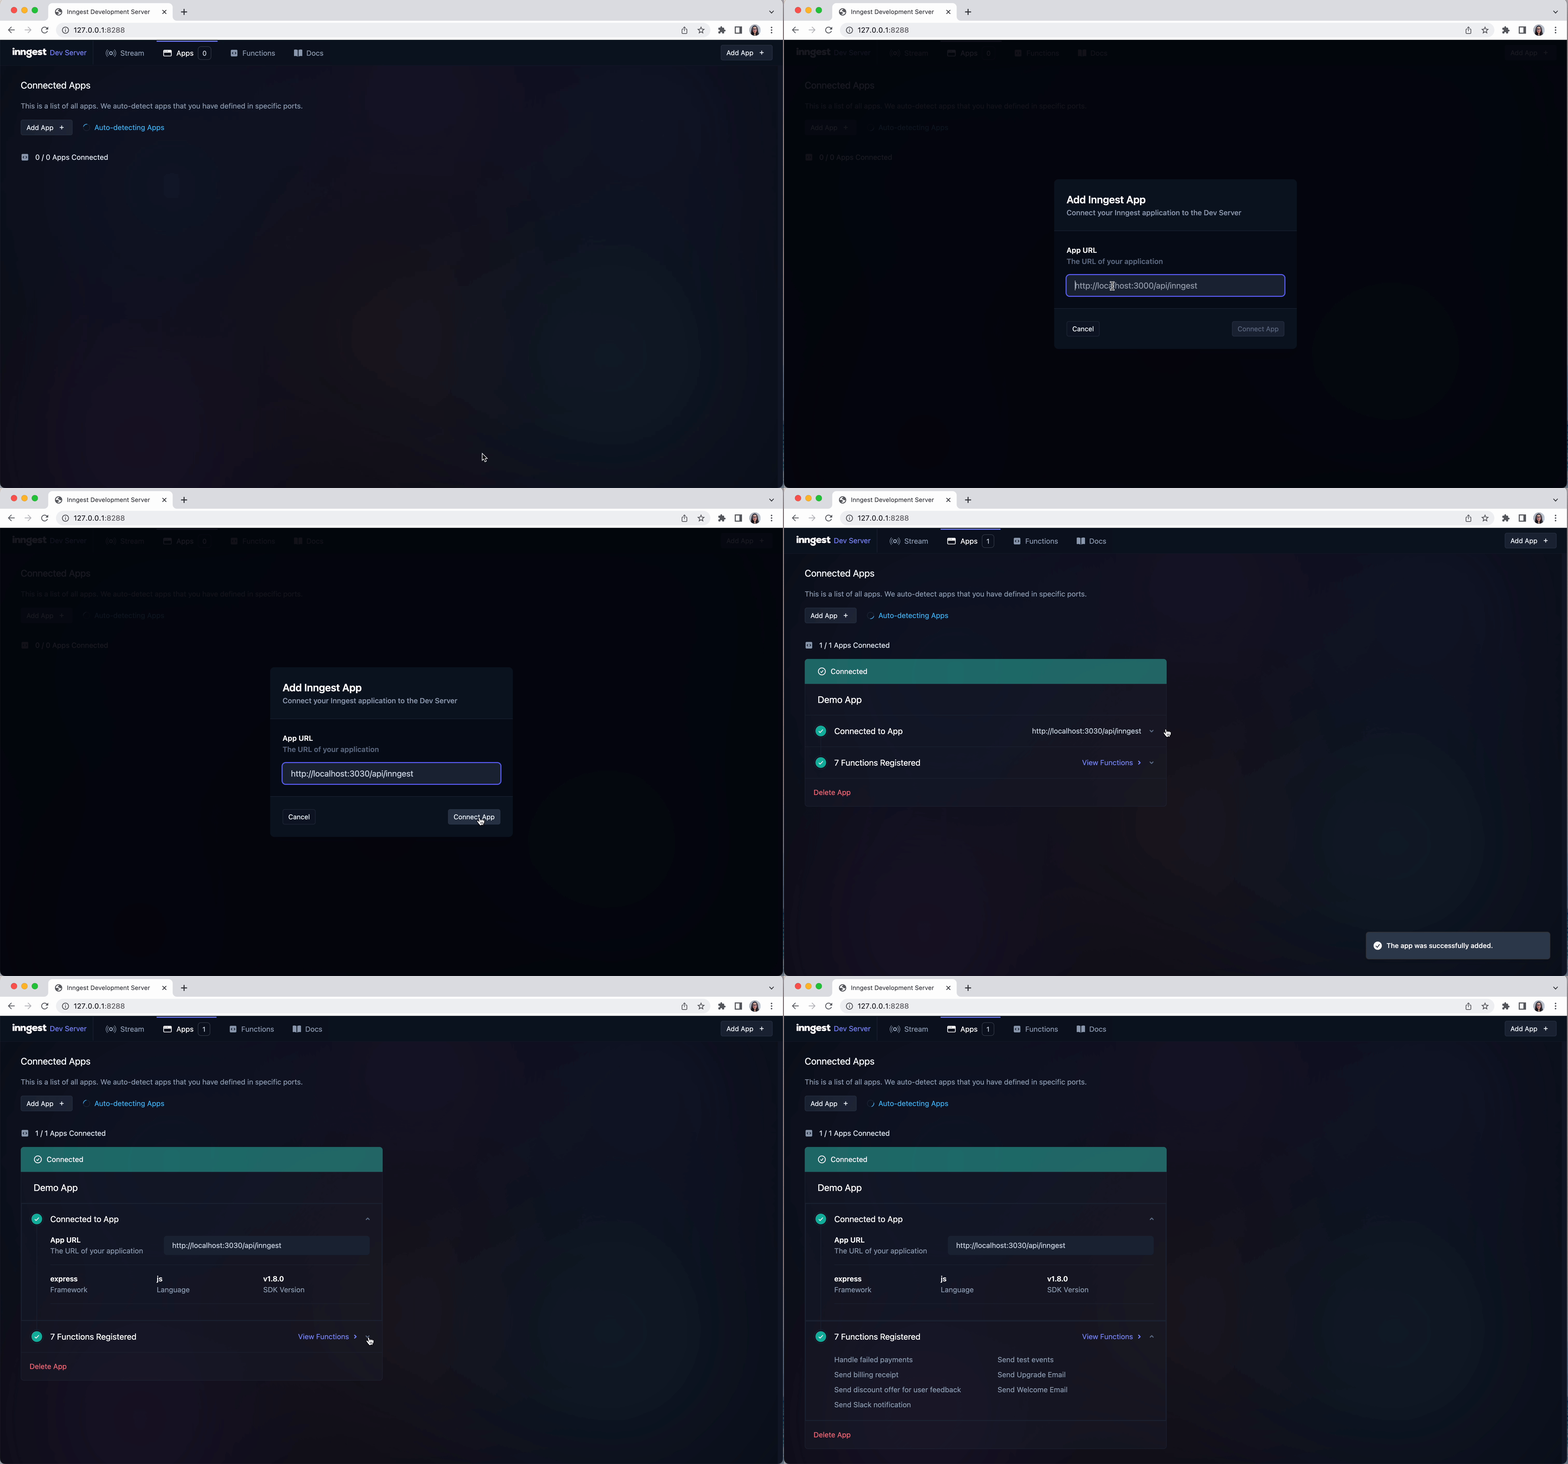
- Manually. For apps running in other ports, you’ll need to paste the local URL to connect the app selecting one of two options:
- Using the CLI -u param
- Adding the URL in the Dev Server Apps page. You can edit the URL or delete a manually added app at any point in time

How functions are loaded by the Dev Server
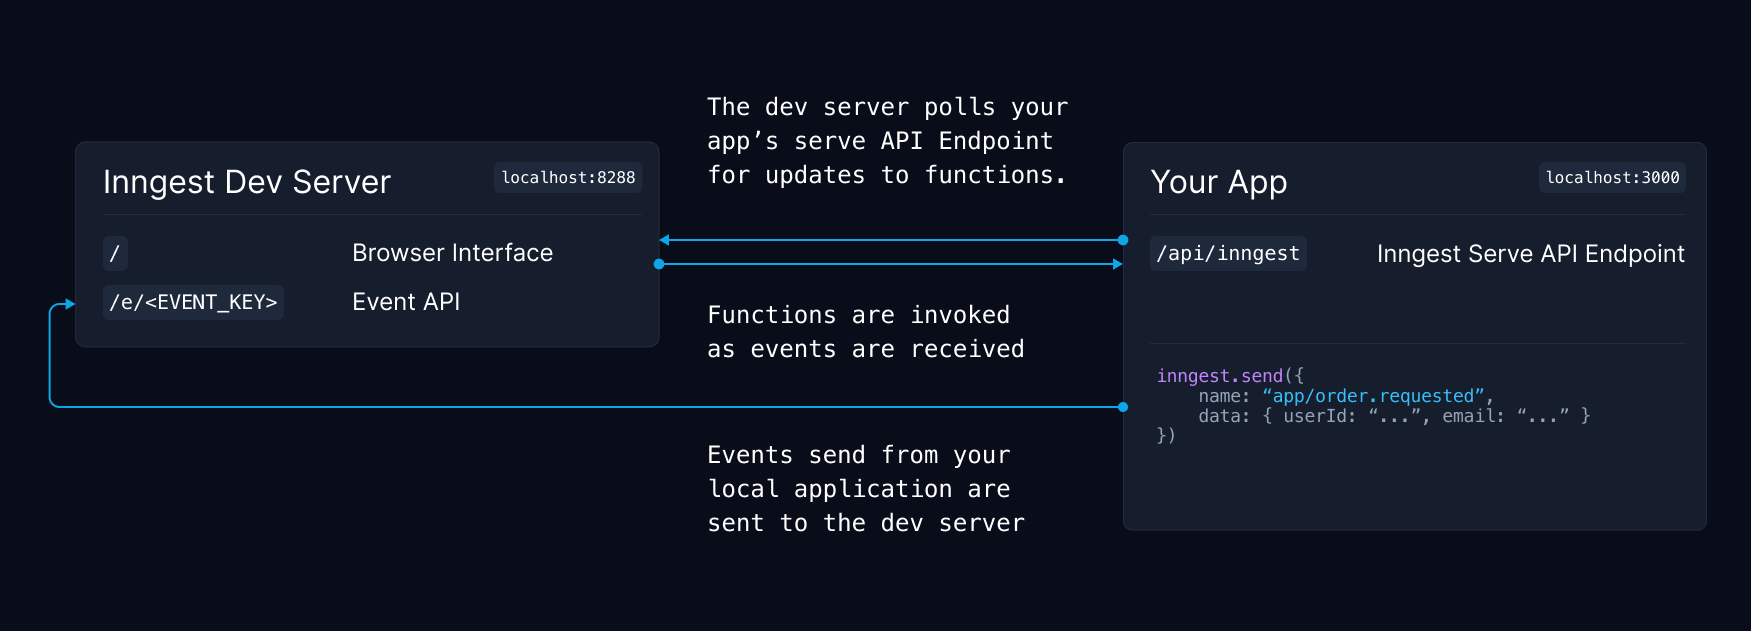
The dev server polls your app locally for any new or changed functions. Then as events are sent, the dev server calls your functions directly, just as Inngest would do in production over the public internet.

Sending events to the Dev Server
There are different ways that you can send events to the dev server when testing locally:
- Using the Inngest SDK
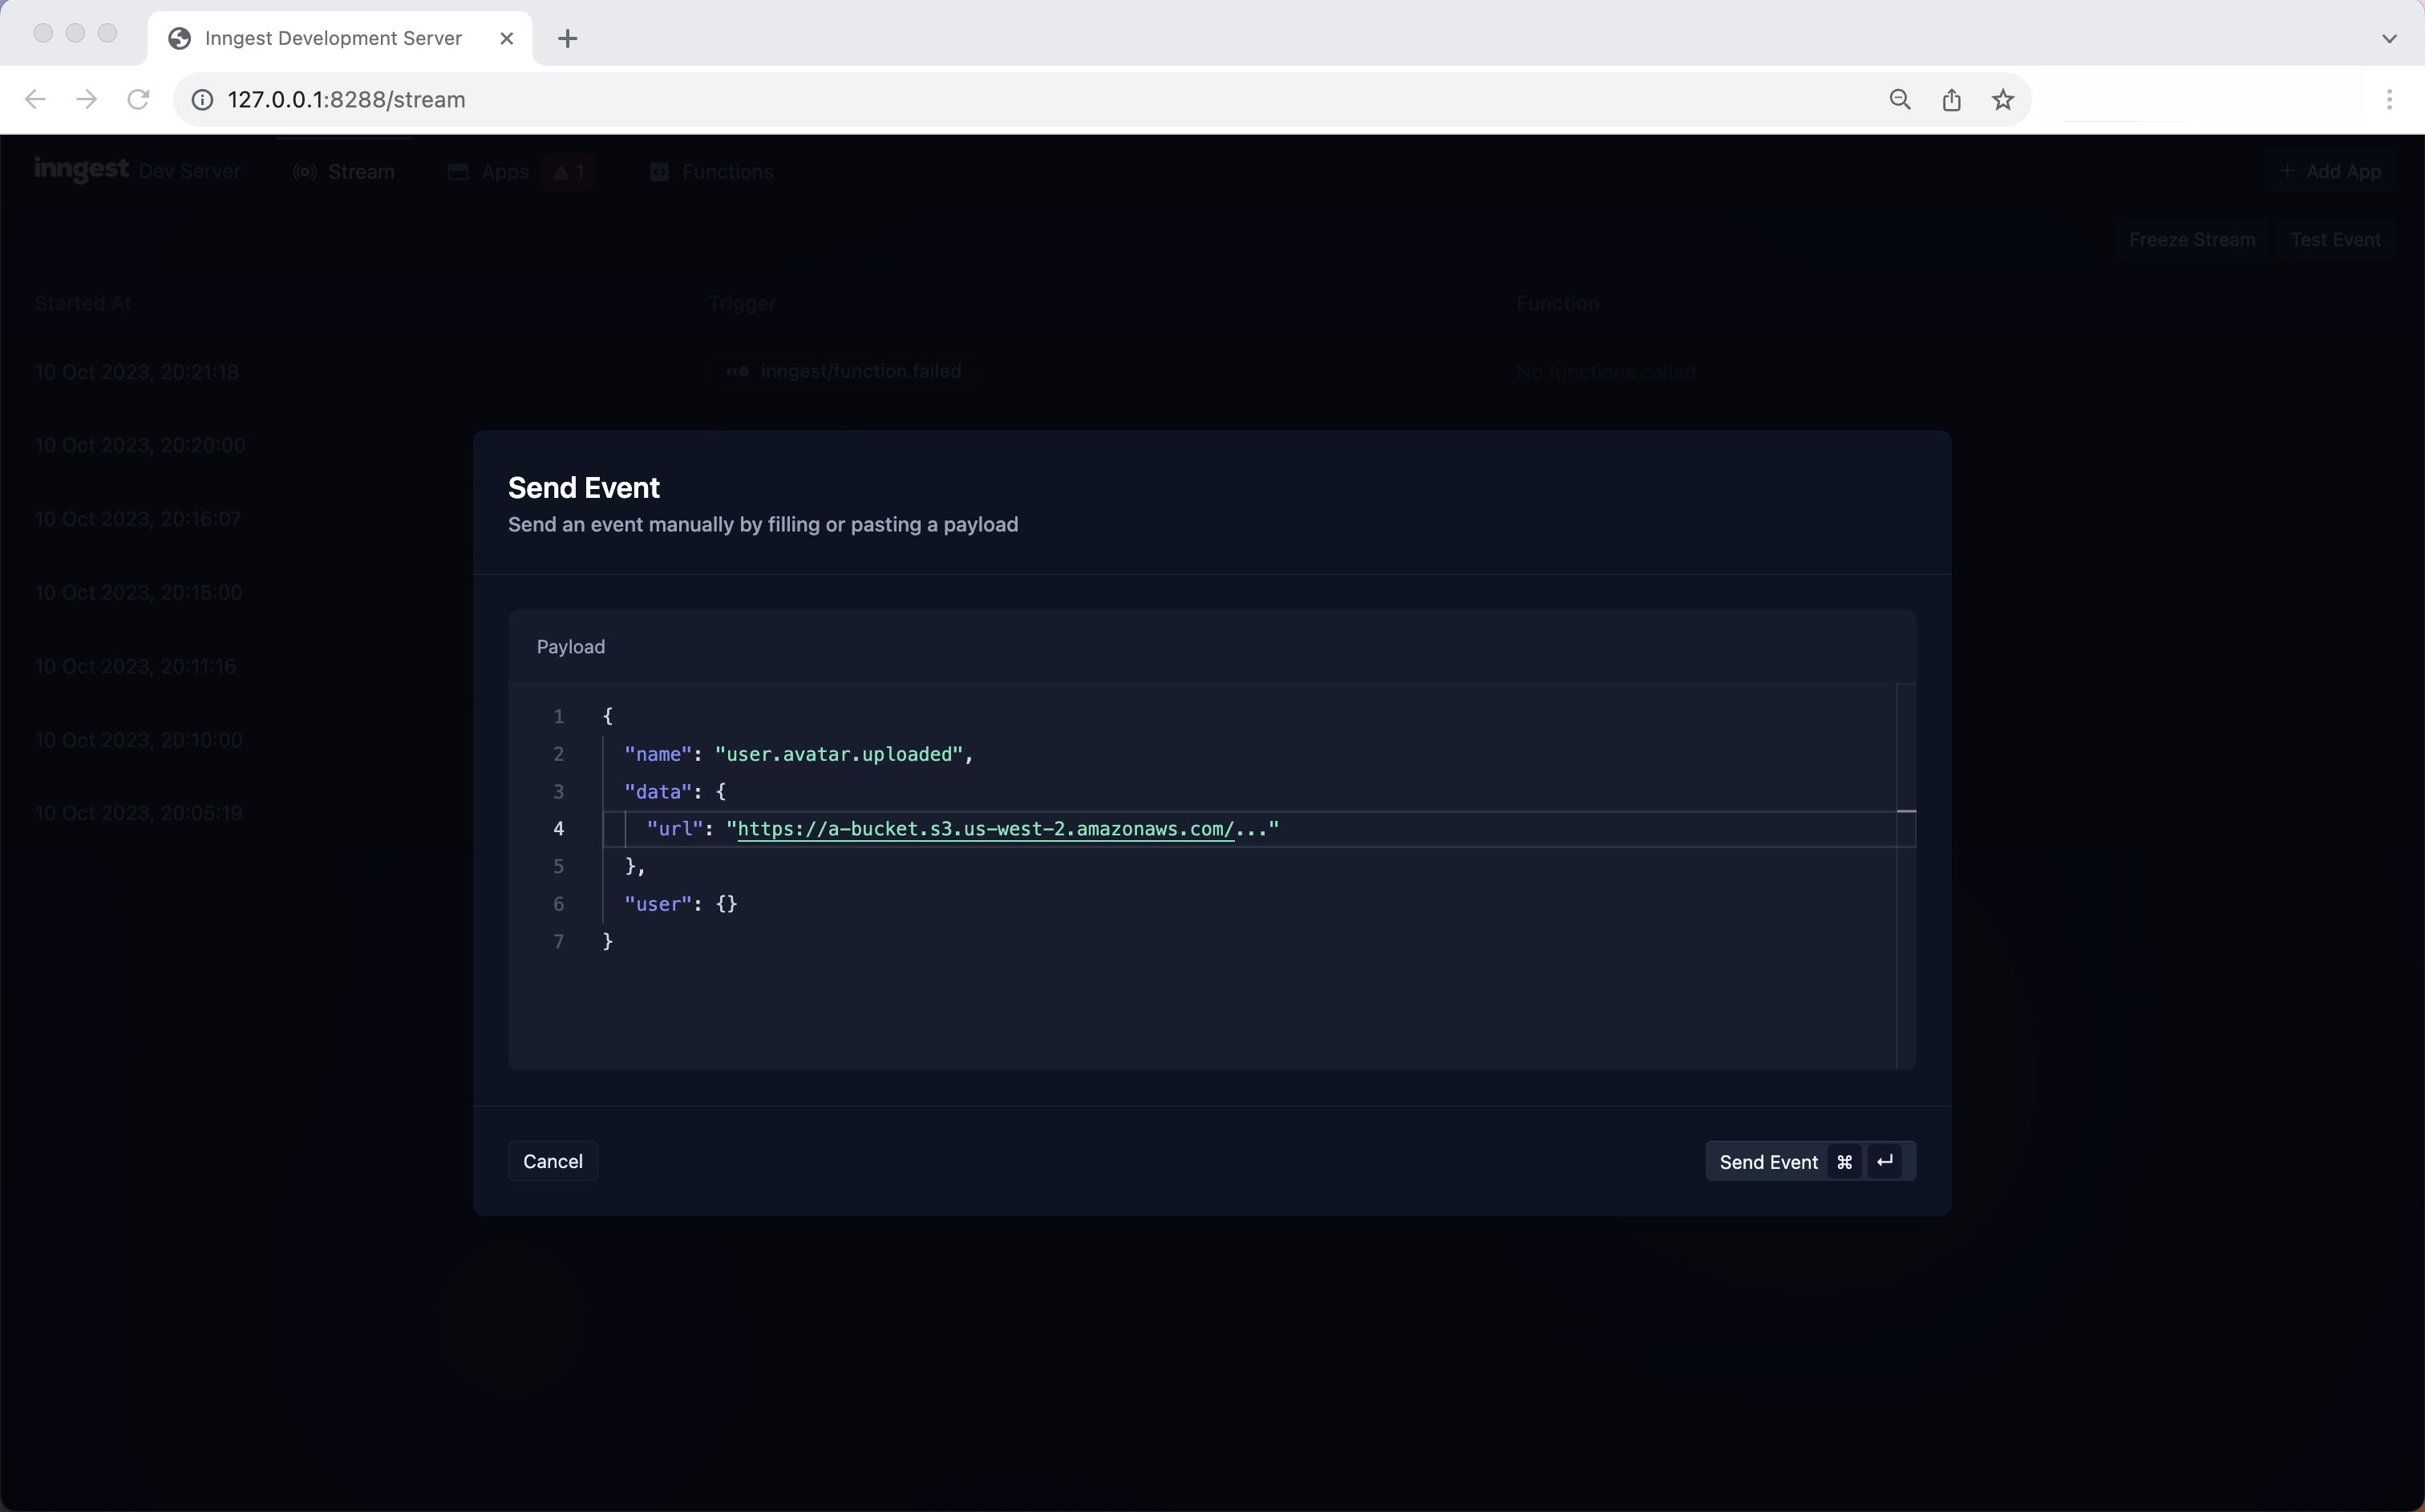
- Using the "Test Event" button in the Dev Server's interface
- Via HTTP request (e.g. curl)
Using the Inngest SDK
When using the Inngest SDK locally, it tries to detect if the dev server is running on your machine. If it's running, the event will be sent there.
const inngest = new Inngest({ id: "my-app" });
await inngest.send({
  name: "user.avatar.uploaded",
  data: { url: "https://a-bucket.s3.us-west-2.amazonaws.com/..." },
});
Note - During local development, you can use a dummy value for your INNGEST_EVENT_KEY environment variable. The dev server does not validate keys locally.
Using the "Test Event" button
The dev server's interface also has a "Test Event" button on the top right that enables you to enter any JSON event payload and send it manually. This is useful for testing out different variants of event payloads with your functions.

Via HTTP request
All events are sent to Inngest using a simple HTTP API with a JSON body. Here is an example of a curl request to the local dev server's /e/<EVENT_KEY> endpoint running on the default port of 8228 using a dummy event key of 123:
curl -X POST -v "http://localhost:8288/e/123" \
  -d '{
    "name": "user.avatar.uploaded",
    "data": { "url": "https://a-bucket.s3.us-west-2.amazonaws.com/..." }
  }'
💡 Since you can send events via HTTP, this means you can send events with any programming language or from your favorite testing tools like Postman.
Inngest SDK Debug page
The SDK's serve API endpoint will display a landing page that allows you to check that your functions have been successfully served and the endpoint is accessible.
To view this, you can visit the route where (default /api/inngest) on your local serve, e.g. http://localhost:3000/api/inngest. Here we cURL a local app to see some basic health check data.
$ curl -s http://localhost:3000/api/inngest | jq
{
  "message": "Inngest endpoint configured correctly.",
  "hasEventKey": false,
  "hasSigningKey": false,
  "functionsFound": 1
}